

Teach your baby to communicate without saying a word.
How many times have you seen your baby wailing and wondered what he wanted?
Like most parents, you probably think this will remain a mystery for months until your child can say that he’s thirsty, hungry, or sleepy.
But what if we told you there’s a way to communicate way before then?
That’s the idea behind baby sign language. A group of simple gestures that you can teach your child to communicate his needs with you.
Before we get into how you can teach your baby sign language, let’s first talk about the many benefits of sign language and the exact age a baby becomes old enough to start learning.
Research Backed Benefits of Sign Language
Here’s what the research says about sign language:
- A Study by Scholar Works found out that learning sign language, in fact, improves language development in children.
- A Study by Capirici, Cattani suggests that learning sign language could improve cognition (intelligence) in children without hearing disabilities.
- A research review by Millar and Light concludes that sign language can help older children as well as young children communicate. The same review goes on to say that teaching sign language to children with developmental disabilities does not prevent them from talking. If anything, it may actually support their ability to speak.
So sign language isn’t just for the hearing impaired. Every parent can teach it to their babies to better understand their needs and wants.
When to Start Teaching Sign Language
Most babies are ready to start learning sign language when they’re between six to nine months old. However, some babies need a little more time.
As a rule of thumb, experts recommend teaching your baby sign language as soon as he’s able to keep eye contact with you for at least five seconds.
6 Tips to Keep In Mind to Teach Signs Effectively
Keep in mind that when you start teaching your baby, he might not sign back even though he can understand what the signs mean.
That happens because your baby hasn’t developed certain motor skills required to perform gestures.
1. Sign As Needed
Start with the most important signs that are meaningful and useful to your baby. Signs that your baby needs to express his everyday needs, such as being sleepy, thirsty, or hungry.
2. Follow Your Baby’s Signs
You may not know this, but many babies invent their own signs. If yours does too, try to understand what he is trying to say.
Once you understand what his made up sign means, say the word associated with it out loud.
For instance, let’s say he makes up a sign to ask for more food, then say “more food” out loud to ensure your baby connects the sign with the words.
3. Be Consistent
When it comes to sign language, repetition is key.
Sign frequently and consistently. Seeing the same sign again and again increases the chances of your baby learning and imitating that sign more quickly.
4. Put On FaceTime
Babies love to look at our faces, especially our eyes. That’s why you should make signs close to your face so that your baby will be more likely to notice them.
5. Know When to Sign Off
A good time to stop teaching is when your baby becomes frustrated with sign language. You shouldn’t continue teaching your child if he’s not comfortable learning.
Remember, the idea behind sign language is to reduce frustration for both you and your baby — not add to it.
6. Sign Up for Classes
If you want to take it up a notch, sign your baby and yourself up for a class on baby sign language. It’s way more effective than learning at home.
But if that’s not an option for you, then you can search for books or online resources that teach baby sign language.
The 8 Signs You Should Start With
Here are the 8 signs you should teach your baby before all others.
1. Potty Time
- Make a fist and clench it.
- Place your thumb between your index finger and middle finger, while keeping your hand as a fist.
- Raise your hand and shake it slightly to indicate potty time.
Use this sign every time you change your baby’s diaper.
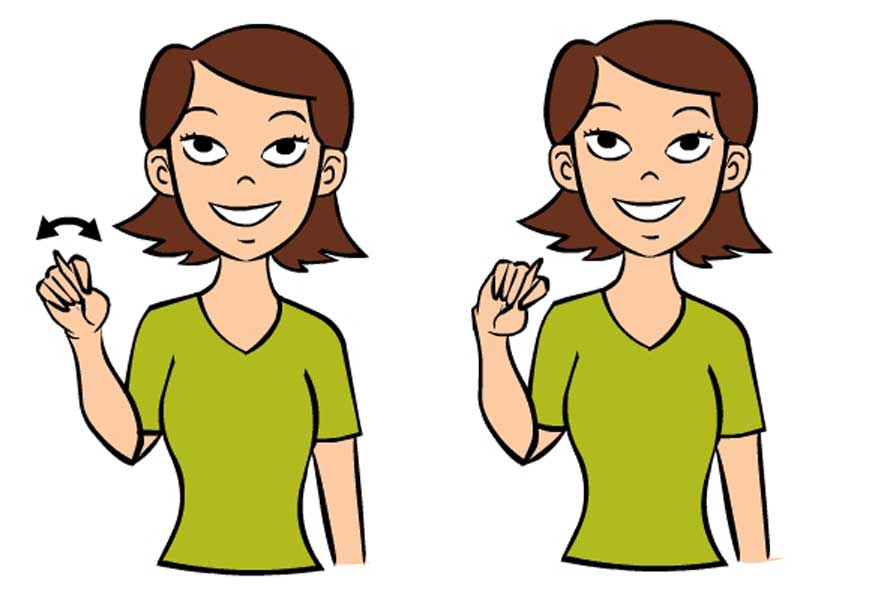
2. Pacifier

- Make a fist.
- Position your index finger into a hook, while keeping the rest of your fingers curled towards your palm.
- Bring your hooked index finger in front of your nose to indicate a pacifier.
Do this in front of your baby whenever he asks for his pacifier.
3. Daddy

- Spread your fingers apart on your right hand.
- Place your thumb on your forehead.
- Wiggle your fingers slightly to indicate daddy.
Do this every time your baby wants his daddy.
4. Mommy

- Spread your fingers apart on your right hand.
- Place your thumb on your chin.
- Wiggle your fingers slightly to indicate mommy.
Do this every time your baby wants his mommy.
5. Play

- Curl your index, middle, and ring fingers toward your palms on both hands.
- Your thumbs and pinkies should be sticking out.
- Place your hands in front of your chest with your palms facing you, and shake your hands.
Use this sign whenever your child wants to play.
6. Drink

- Pretend you’re holding an imaginary glass and raise it to your open lips.
Use this sign whenever your baby wants to drink.
7. Eat

- Press your fingers together as you would when holding food.
- Tap your mouth.
Do this every time your child wants something to eat.
8. More
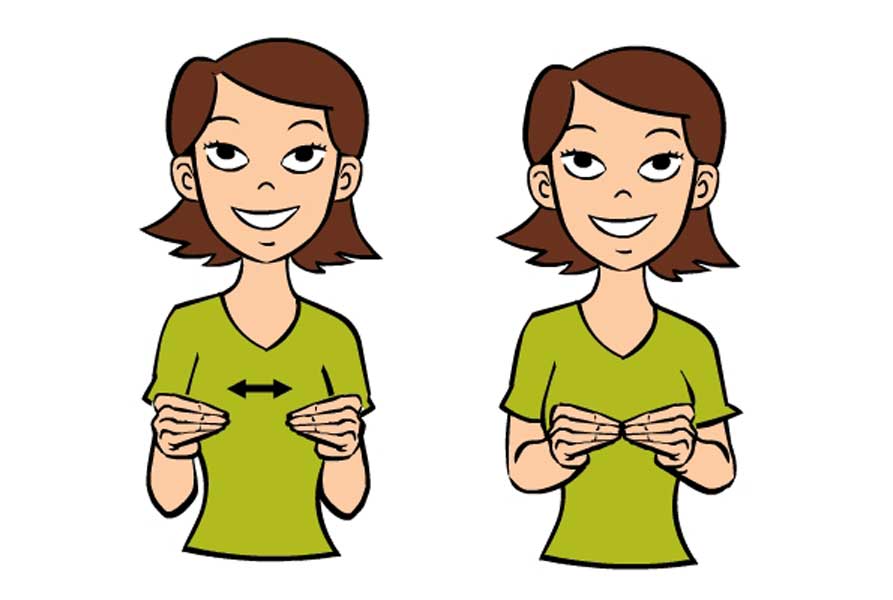
- On both hands, bring your fingers and thumbs together.
- Place your hands in front of your chest.
- Position your hands in such a way that the tips of your fingers on one hand face the tips of your fingers on the other hand.
- Tap the fingers several times.
Use this sign whenever your child asks more of anything, such as food, toys, or water.